Crispy Gnocchi w/ Brown Butter Sauce

Standard

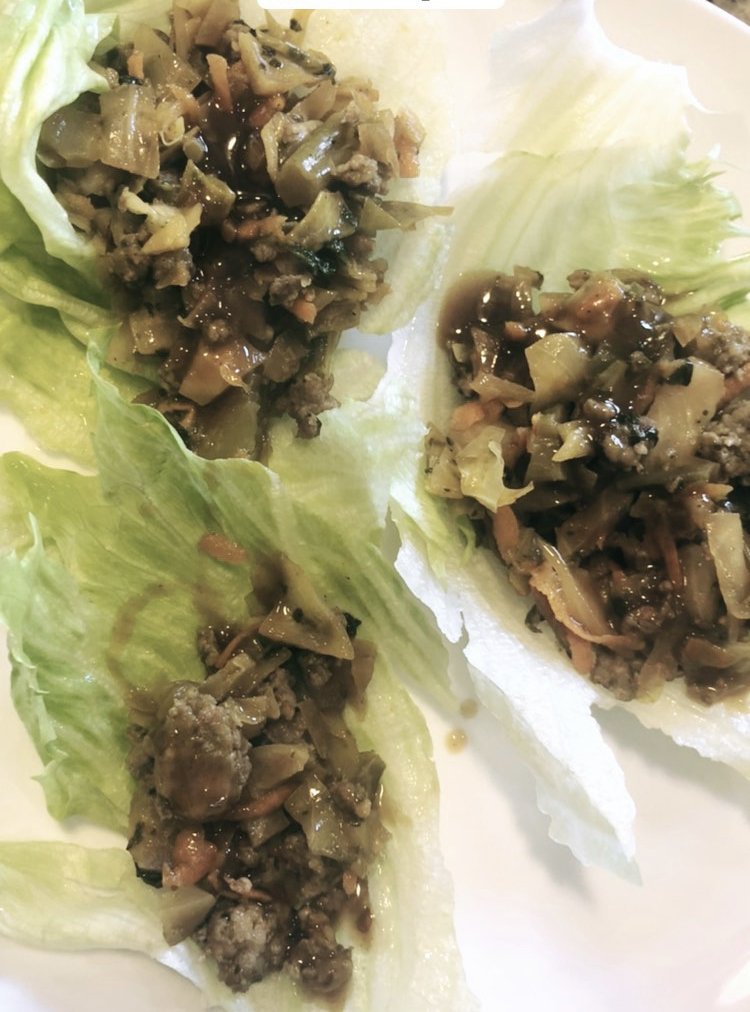
Gnocchi = small heavenly potato pillows from Italy. Did you know that technically it’s not pasta, but actually a dumpling? Well, I was 40 years old when I learned this factoid so don’t feel too bad if you didn’t score points there. I think gnocchi is at its best when it has a bit of texture – IE: cooking in butter before coating with sauce. For real…what isn’t better when first cooked in butter? This dish is perfect for fall and winter moods and even with a lot of steps, it is super easy to tackle. This recipe can be made with or without the Italian sausage.

INGREDIENTS:

  • 16 oz package of gnocchi (or you over achievers can make your own)
  • 1 stick / 8 tbsp of unsalted butter – room temperature
  • 1 tsp fresh lemon juice
  • 1tsp fresh lemon zest
  • 3 tbsp apple cider
  • 10 fresh sage leaves
  • 1 tsp ground dried sage
  • 8 oz ground Italian sausage
  • 1/4 cup white wine
  • 1 tbsp EVOO
  • Salt
  • Fresh ground pepper

INSTRUCTIONS:

  1. On a cutting board or plate, lay down 2-3 paper towels
  2. Bring 8 cups of water to a high boil in a large pot. Add 2 pinches of salt.
  3. Reduce to a low boil
  4. Add gnocchi to boiling water and cook according to package instructions – or until most of the gnocchi float to the top. Usually about 2 minutes cooking time.
  5. With a slotted spoon, remove gnocchi from water and place onto paper towel to dry and cool for approx 5 minutes.
  6. Reserve 1/4 cup water and discard the rest
  7. In a large skillet, melt 2 tbsp of butter over medium high heat (on my induction stove I was cooking at an 7 of 9 temperature)
  8. Once butter is melted, transfer gnocchi from drying towels to the pan. Arrange in flat layer.
  9. Cook at medium high heat, stirring occasionally until gnocchi begin to brown and get crispy.
  10. Add ground sage and a pinch of salt – stir.
  11. Continue to cook until at least half of the gnocchi are showing browning areas – then remove from heat onto a plate and set aside.
  12. Prepare a plate with another 2-3 paper towels
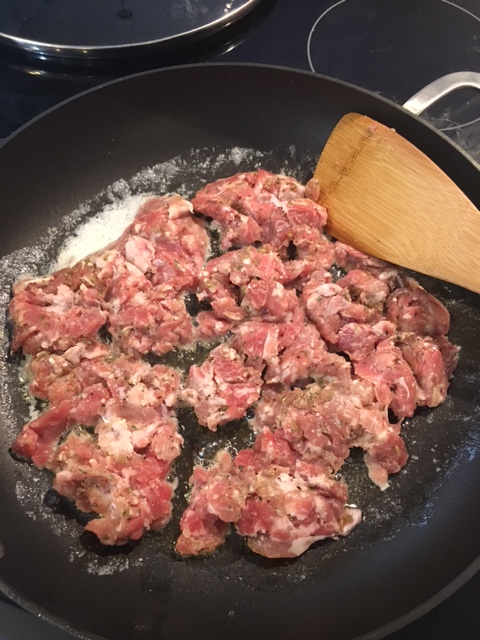
  13. In same skillet, add EVOO and the ground sausage. Break up and cook over medium high heat until there is no pink and the sausage is cooked through. You want the sausage to have some texture so ensure the meat is crispy in areas, with lots of browning – but not burnt.
  14. Remove sausage from heat and place onto paper towels, spread around to allow absorption of grease
  15. In same pan, turn up heat to medium/high. Add wine to deglaze the pan. Let the wine bubble and cook a bit until at least half of the of the wine liquid is cooked off
  16. To the simmering white wine add lemon juice and apple cider. Stir with a whisk to scrape up the bits from the bottom of the pan.
  17. Add remaining 6 tbsp of butter and whisk until combined and simmering.
  18. Add 1-2 tbsp of reserved cooking water. The goal is to extend the sauce and use the starch in the liquid to thicken the sauce too – but not make it watery or dilute the flavor.
  19. Add sage leaves and a healthy pinch of salt & pepper
  20. Continue to cook about another 2-3 minutes until sage leaves are soft and even potentially starting to crisp
  21. Taste sauce and adjust a bit at a time, a pinch of this or that.
    • Too sweet? add a bit of lemon juice and/or pepper.
    • Too salty? add a bit of lemon juice, apple cider, butter or pepper, or more cooking water.
    • Too sour? add a bit of apple cider vinegar or more cooking water.
    • Too bland? add salt and pepper
  22. Add gnocchi and cooked sausage back to pan. Mix to coat in the sauce.
  23. Add lemon zest. Mix again.
  24. Spoon into bowls and top with parmesan cheese.
Gnocchi floating in water- ready to be pulled
Gnocchi post cooking / browning
Cooking the sauce
Mixed all together!
FIN!

Shrimp & Brussels Sprouts Alfredo

Standard

I love good alfredo sauce dish. No, it’s not healthy but who cares? I never said this was a place for healthy food. Life is short – just do the heavy cream and move on. Alfredo sauce is not only delish, but it goes with almost everything. I use it on pizza, pasta, with a wide variety of proteins or veggies – it’s always yum. I feel like I can balance out the calories with green veggies, so tonight I tried brussels sprouts. My normal go-to with alfredo is broccoli or chopped asparagus but this time I tried brussels sprouts…and damn was it good.

INGREDIENTS

  • 1 lb Raw deveined shrimp, tail on or off. Can be frozen or fresh (fresh of course best but frozen is honestly very good. Shrimp hold up well to freezing)
  • Alfredo sauce
  • 2 cups brussels sprouts, stems cut and sliced thin (about 1/4 inch thick rings)
  • Your choice of pasta
  • 4 tbsp butter
  • 1 tsp garlic
  • 1 tbsp olive oil
  • 1/4 cup white wine (dryer wine, not sweet)
  • 1/4 cup chopped parsley (Italian preferred)
  • salt
  • pepper

INSTRUCTIONS

  1. If using frozen shrimp, must start this step at least 4 hours in advance. If you don’t want to do that…buy fresh shrimp. Put frozen shrimp on a plate (not paper plate) lined w/ paper towels to thaw. Do NOT run the frozen shrimp under hot or cold water to rush the thaw process. The shrimp must thaw slowly or they take on a rubbery texture and are terrible to eat. Not good.
  2. Once shrimp are thawed, remove paper towels that should be wet from the melted ice. Replace with fresh dry towels. Remove tails at this time if your shrimp had their lil’ tails still on
  3. Pat shrimp dry and lightly salt & pepper both sides of the shrimp
  4. Melt 2 tbsps of butter in a larger non-stick saute pan over medium heat
  5. Add garlic to pan – cook for 1 minute
  6. Add white wine to the pan and cook for 1 minute
  7. Add shrimp to pan and ensure they are laying flat, none on top of each other or crowded. There should be free space around each lil’ shrimp
  8. After 2-3 minutes, shrimp should be cooked on one side: pink and shrimp are tightening up into more of a ‘C’ shape.
  9. Turn shrimp over to cook other side
  10. After about 1 more minute, dump all ingredients of the pan onto a plate and spread shrimp out. Set plate to side.
  11. Lightly wipe pan with a paper towel and return pan to stove top – we’re coming back to this guy once pasta gets moving
  12. Heat large pot with salted water and bring to a boil
  13. Place your choice of pasta in the pot and begin to cook
  14. Melt other 2 tbsp of butter in the same sautĂ© pan – this time over medium high heat
  15. Add olive oil
  16. Add shaved/chopped brussels sprouts to pan
  17. Sprinkle with a couple of small pinches of salt and pepper
  18. Cook in pan, moving sprouts about – until brussels sprouts are tender to a fork puncture but are not mushy – probably 5-8 min
  19. Remove pan from heat and place brussels sprouts onto a plate next to the cooked shrimp
  20. Check pasta for done-ness. If pasta is slightly al dente and soft to the bite, drain pasta and leave in colander. Place paper towel over pasta to ensure it keeps some heat.
  21. Make alfredo sauce – can make ahead but its better when its fresh and hot
  22. Return pasta to large pot
  23. Add cooked shrimp and brussels sprouts to the pot
  24. Add alfredo sauce to your liking of sauciness. The hot alfredo sauce will heat up the sprouts and shrimps
  25. Serve immediately in pasta bowls and top w/ chopped parsley

Pairs well with a dry white wine like a sauv blanc or a dryer pinot grigio. Good caesar salad and foccacia bread FTW. (CARBS!!!)

Alfredo Sauce

Standard

INGREDIENTS

  • 4 tbsp butter
  • 1.5 Cups Heavy Whipping Cream
  • 2 Teaspoons Garlic Minced
  • ½ teaspoon dried rosemary
  • ½ teaspoon dried thyme
  • ½ teaspoon oregano
  • ½ teaspoon sage
  •  ½ teaspoon Salt
  • ½ Teaspoon Pepper
  •  2 Cups Freshly Grated Parmesan Cheese

INSTRUCTIONS

  1. Melt butter in saucepan
  2. Add garlic and cook until fragrant, about 1 minute
  3. Add cream and turn to very low simmer for 2-3 minutes
  4. Add salt, pepper & other dried spices
  5. Stir for another 1-2 minutes
  6. Add parmesan cheese 1/2 cup at a time. Whisk until smooth before adding in more cheese
  7. Top favorite cooked pasta and serve.
  8. Suggest serving immediately as alfredo can thicken up quickly.

Martha’s Egg Rolls

Standard

IMG_5327

My husband has very fond memories of his mother making stacks of delicious egg rolls for dinner. As we’re in Corona quarantine, and got lots o’ time for cooking ourselves down memory lane…he snagged the recipe from her. I made a few tweaks but man they were delicious. The filling is not only delicious in egg rolls, but we used it for lettuce wraps and then making a quick fried rice when tossed with a scrambled egg over white rice. These are so delicious, thanks to my amazing MIL for a great inspiring recipe.

Ingredients:

  • Egg roll wrappers (we like this brand)
  • 1 cup canola oil (may need more)
  • 1/2 cup water
  • Filling:
    • 12 oz breakfast sausage
    • 3 cups chopped cabbage
    • 1 cup shredded carrots
    • 1/2 cup green onions finely chopped
    • 1 cup chopped broccoli florets
    • 1 cup fresh chopped spinach
    • 2 tsp fresh minced ginger
    • 1 tsp Chinese 5 spice
    • 1 tsp garlic minced
    • 1/4 cup soy sauce
    • 1 tbsp rice vinegar
    • 2 tbsp sesame oil

Directions:

  1. Heat oven to 275 degrees.
  2. In large skillet heat 1 tbsp sesame oil, cook sausage over medium high heat until browned and cooked through – no pink remaining. Line plate w/ paper towels and drain. Set aside.
  3. In same skillet, use other 1 tbsp of sesame oil. Cook garlic and onion for 2 minutes over medium heat.
  4. Add in cabbage and cook down for 2-3 min. Should begin to be soft.
  5. Add in carrots, broccoli, spinach, ginger, soy sauce, 5 spice Stir together and cook until all ingredients are soft.
  6. Assemble egg rolls using the water as a wrap moistener. This is a great instructional  video.
  7. Heat canola oil over medium high.
  8. Cook egg rolls in batches 4-5, seam side down. Cook for 4 or so minutes on side one until golden brown, then flip to cook 3-4 min on opposite side until golden brown. Remove from oil and place on paper towels on top of a cookie sheet.
  9. Place cookie sheet with egg rolls in the pre-heated oven to keep them warm until time to eat
  10. Enjoy with your favorite sauce. I prefer the House of Tsang brand peanut or chili sauces.
  11. If you choose have leftovers and choose to reheat, I recommend air fryer or oven – microwave will make soggy.

IMG_5326

Breakfast Pizza

Standard

IMG_5299

I’m a big fan of breakfast pizza, but the first time I had Casey’s breakfast pizza (YES, from a gas station – no joke), that was IT. No other breakfast pizza could hold a candle to Casey’s. While I’ve had more time on my hands lately (thanks a lot Covid-19), I decided to make it for myself. In my opinion, the MOST important thing about any pizza is the sauce – and this one makes the pizza, even though its so simple. This is super easy, anyone can do it, kids love it too.

Ingredients:

  • 1 can pillsbury pizza crust dough  (feel free to make your own, but I like this product and its a time saver)
  • 5 eggs
  • 2 tbsp cottage cheese
  • 8 oz chub breakfast sausage
  • 1/4 cup chopped onion
  • 1 tsp minced garlic
  • 1 cup shredded cheddar cheese
  • 1 cup shredded mozzarella cheese
  • 1 tbsp chopped chives
  • 1 tsp red pepper flakes (optional)
  • 2 tbsp butter
  • 2 tbsp flour
  • 3/4 – 1 cup milk (any kind but skim)
  • 1 tsp ground sage
  • 1 tsp salt – divided
  • 1 tsp pepper – divided

Directions:

  1. Heat oven to 425 degrees. Lay pillsbury dough onto cookie sheet. Form to your liking and cook for 6-8 minutes until bottom is mostly firm. (par baking the dough getting it ready for toppings). Pull from oven. Set aside.
  2. In small to medium skillet, over medium heat, cook breakfast sausage with garlic and onion until crumbled and brown. Removing all pink. Line plate with paper towels and drain sausage. Set aside. Do not wipe skillet clean.
  3. Crack 5 eggs into bowl. Whisk in the cottage cheese. Add 1/2 tsp salt and 1/2 tsp pepper. Whisk until all combined. Over medium heat in the same skillet as the sausage, scramble the eggs until soft and most liquid is absorbed. Do not cook fully, the eggs should look very wet still but not runny. Set aside.
  4. In same skillet, melt 2 tbsp butter over medium hit. Once melted and bubbly, whisk in flour and stir until absorbed and small clumps. Cook while stirring for another minute. Slowly whisk in milk until the sauce begins to thicken. Once sauce consistency stays about the same – add in the remaining 1/2 tsp and 1/2 tsp pepper. Then sprinkle in 1/2 cup of the cheddar cheese and stir until melted. Remove from heat.
  5. TIME TO ASSEMBLE PIZZA!
  6. Spread sauce across pizza, keep about 1/2 inch border uncovered around the edges.
  7. Sprinkle remaining half cheddar cheese on top of the sauce. Feel free to add more if you like. Most people like more cheese. 🙂
  8. Next sprinkle on the sausage. Spread eggs evenly across top of sausage. Finish with 1 cup shredded mozzarella cheese.
  9. Place in oven for 7-8 minutes until almost cooked. Turn on broil high for 1-2 minutes to get the top golden bubbly. e careful not to overcook.
  10. Let cool. Sprinkle w/ chives & red pepper flakes. Cut & Serve!

IMG_5297IMG_5300

Brown Butter Shells w/ Sausage & Pecorino

Standard

IMG_5013

The recipe inspiration here was from Blue Apron – but we did switch it up just a tad, but I feel I should give them appropriate credit. It was yum. This is a quick and easy recipe that tastes like it took longer than it did. Its become a staple in our house, even our little one will eat it! 🙂 Hope you enjoy.

INGREDIENTS:

  • Italian sausage – 1/2 lb already ground or approx 3-4 Italian sausage links (removed from their casings)
  •  1.5 cups fresh peas or can use frozen
  • 1/2 cup Pecorino cheese
  • 4 tbsp butter
  • 1.5 tbsp dried ground/rubbed sage
  • 1/2 tbsp fresh chopped garlic
  • 8 oz orecchiette or shell pasta

DIRECTIONS:

  1. Heat large pot of water to boiling and cook pasta until al dente
  2. Meanwhile in larger skillet (ensure at least 2. inches deep) heat 4 tbsp of butter (or a bit more if you like) over medium high heat
  3. When butter begins to foam, add in sausage and begin to cook until browned. Breaking up sausage with back of wooden spoon – into little bits.
  4. Add garlic and continue cooking.
  5. When pasta is finished, reserve 1/2 cup of pasta water and strain off the rest. Set aside.
  6. When sausage is almost finished cooking (only a few spots of pink left), add in the sage and cook until sausage is completely cooked through.
  7. Add in peas and the cooked pasta.
  8. Stir together.
  9. Reduce heat to medium/low.
  10. Add in 2 tbsp of pasta water, scraping the bottom of the pan to get up any brown bits. The water should help start to make a sauce.
  11. Add in another 2 tbsp of pasta water and stir.
  12. Add in pecorino cheese, a pinch of salt and a couple of pinches of black pepper.
  13. If the sauce is too thick – add in another tbsp of pasta water at a time, stir in between to ensure you don’t add too much water – you want there to be a coating…but not soupy.
  14. Remove from heat and serve!

IMG_5004

boiling pasta

IMG_5003

cooking Italian sausage

IMG_5005

added sage and garlic

IMG_5006

adding peas

IMG_5007

adding pasta

IMG_5008

adding cheese

IMG_5009

mixing and adding salt/pepper

IMG_5012

LOOK at this FACE. Loving his pasta. 🙂 

Artichoke Dip Flatbread

Standard

IMG_4617

My husband planted us a super awesome garden this year – now our lettuce and spinach runneth over. I was trying to think of ways to use the spinach outside of salads – which we were getting sick of. I mean we aren’t effing rabbits. Then – spinach artichoke dip popped into my head. Great idea…but I always consider that to be an appetizer and didn’t think that ‘dip’ really counted as dinner. So, I took it a smidge further to relieve my ‘we had dip for dinner’ guilt. If you smear it on a flatbread, TA-DA, I now made a pizza. Sounds like much more work than ‘dip’. 🙂  It really was very good and it reheated well the next day. I think this would work as an appetizer or dinner…or leftovers for lunch at the office microwave station.

The other awesome thing here, is if you put all this into a skillet or oven-safe dish, then add a layer of cheese on top, bake for about the same time – and voila! You have spinach artichoke DIP. Then you can toast/cut some naan – or serve with tortilla chips. Two recipes in one. You’re welcome.

Ingredients:

  1. 3/4 cup light mayo (I use olive oil mayo)
  2. 1.5 cups chopped spinach – lightly packed
  3. 1 tbsp minced garlic
  4. 1 cup shredded mozzarella cheese
  5. 1 cup shredded parmesan cheese
  6. 1 can of quartered artichokes, drained and chopped into smaller bits
  7. 1 tsp black pepper
  8. 1/2 tsp salt
  9. Naan flatbread – can be large or small flatbreads. Room temperature.

Directions:

  • Heat oven to 350 degrees
  • Combine ingredient items 1-8 above in a mixing bowl
  • Mix well until thoroughly combined. Can add more mayo or cheese if its not looking ‘creamy’ or cheesy enough (I just eye-balled it and thought – what does my dip usually look like – and add what I want from there – pretty sure you can’t mess this up)
  • Place the naan(s) on a baking sheet or pizza stone
  • Spread a healthy amount of the mixture on each one, leaving room around the edges for a ‘crust’ – about 3/4 inch
  • Bake in oven for approx 8 or so minutes. A larger flatbread may take about 10 minutes to ensure the middle of the flatbread gets hot.
  • Check at 8 minutes to see that crust is warm and the mixture is hot on top. Leave in oven if it needs more time. Check every 2 minutes.
  • Once almost done, turn the broiler on high and let broil for approx 1 minute- do not leave them in there unattended!
    • Free advice: Never turn your back on the broiler – you stand there or set a timer as a reminder. The Broiler can be your best friend or quite a bitch.
  • Once the tops are a bit golden brown/bubbly from the broiler – remove
  • Let cool for approx 3-4 min, then cut and serve!

IMG_4611

Mixing cheese, garlic, mayo, salt & pepper together

IMG_4612

Adding in spinach – once chopped

IMG_4613

Adding in artichokes once chopped

IMG_4614

Spreading mixture onto the naan/flatbreads


IMG_4616

Out of the oven and chopped – ready for dinner!


Simply Delicious Egg Salad

Standard

IMG_4491

I’ve always been a fan of eggs. Period. All kinds. (well omelets aren’t my jam, but everything else is awesome). When summer rolls around, I don’t know why but I think of egg salad. I used to spend a lot of time at the lake, and you can take a loaf of bread and tupperware container of egg salad – toss it in the cooler – and instant yum on the boat.

It just warmed up here in KC, and due to being pregnant I am missing my eggs benedict, runny fried or poached eggs, and all that eggy delicousness. I am excited to have my 2nd child – but man this time around giving up all those fun foods is WEARING on me. So I was really really CRAVING eggs, and egg salad popped in my head. So I made it. Cheap, Easy, Fast, Delicious…boom.

I’ll toast bread and smear some egg salad on it, take the salad to work with some crackers, or eat it plain (yes, yes I will). If you like deviled eggs or egg salad – you’ll love this recipe.

Ingredients:

  • 7 eggs
  • 1 tbsp dried dill
  • 1 tbsp fresh chopped parsley
  • 2 stalks celery – chopped into very small dice
  • 3/4 cup mayonnaise
  • 1/4 cup mustard
  • 1 tbsp fresh lemon juice
  • salt
  • pepper

Directions:

  1. Place eggs in a pot of cool water
  2. Place on stove and bring to boil.
  3. Once you see rolling bubbles, put on timer for 8 minutes.
  4. When timer goes off,  remove from heat immediately and dump out the hot water/boiling water. Immediately run cold water over eggs. I usually run the cold water for about 30 – 45 seconds to ensure eggs have reduced significantly in temperature.
  5. Let sit in cold water for just a few minutes – you can get your celery and parsley chopped now.
  6. Peel eggs
  7. Chop eggs in half
  8. Place flat side down and then chop lengthwise and then crosswise – small dice
  9. Place chopped eggs into mixing bowl
  10. Add in chopped celery
  11. Add in dill and parsley
  12. Add in mayo and mustard
  13. Add 2 pinches of salt and 2 pinches of pepper
  14. With spatula, fold all ingredients together carefully
  15. Taste – add more of whatever ingredient you think it needs more of. I usually like more mayo and salt. Just follow your tastebuds!
  16. Refrigerate for at least 2 hours – to get really cold and let flavors meld.
  17. Enjoy!

IMG_4477

boiling eggs

IMG_4478

soaking in cold water

IMG_4479

ingredients (minus lemon)

IMG_4480

eggs ready for chopping!

IMG_4482

cutting eggs lengthwise first

IMG_4483

cutting eggs crosswise now

IMG_4485

added celery to eggs

IMG_4487

all ingredients in bowl – ready to mix

IMG_4488

all ingredients folded together


Breakfast Empanadas

Standard

IMG_4470

Empanadas are one of my favorite foods. Empanadas are somewhat like colachis or pierogis – but basically dough stuffed with yummy savory ingredients. Usually meat, meat/cheese just cheese, veggie, etc. I have enjoyed empanadas in Spain – and when I traveled to Argentina years ago on a work assignment and empanadas are EVERYWHERE down there. All kinds. They are delivered to you like pizzas are in the US, boxes of them! Delicious stuffed doughy goodness. What I loved about the deliveries in Argentina is each empanada has a different crust pattern to signify what’s inside (like a rolled crust = pork, while a crust w/ fork marks = beef/onion, and so on.).

I live in Kansas City and we have a lot of Mexican restaurants but not really many Spanish or South American places, so good empanadas are hard to find. They are best if you make your own dough, which I’ve done before, but I’m a working mom with a toddler and another baby on the way – so, this mom aint’ got time for that. I use pre-made dough and it works JUST fine.

I also love breakfast tacos so one day I thought, why not make breakfast empanadas! Ta-da! Brilliance was born. I used more Mexican spices in mine b/c I know Mexican food  & spices better than Spanish or South American. These are great to feed a crowd, kids love them, they are SO EASY to make, make ahead of time, can pop leftovers into the oven or toaster oven  – super yum and convenient. Hope you give this recipe a shot!

*I used bacon in this round, but I’ve used breakfast sausage before. If you want to do this sub 1 cup cooked sausage for the bacon. Or you can toss in veggies vs. meat if you wish. 1 cup should do the trick.

Ingredients:

  • 1 package grands biscuit dough – just buy the regular biscuit dough, nothing fancy
  • 5 eggs
  • 5 strips of bacon – cooked and chopped into small pieces
  • 1 cup shredded cheese – I use cheddar or monterey jack
  • 1 tbsp EVOO
  • 1 tbsp minced garlic
  • 1/2 cup diced white onion
  • 1/2 cup diced red pepper
  • 1 tsp cumin
  • 1 tsp oregano
  • 1 tsp chili powder
  • 1/2 tsp paprika
  • 2 tbsp water
  • salt
  • pepper

Directions:

  1. Heat oven to 350 degrees (follow package directions for dough)
  2. Place biscuit dough on flat cold surface, no flour!
  3. Pat down biscuits until flat
  4. Use rolling pin to further flatten dough to about 5 inches across – not too thin
  5. Heat pan over medium heat
  6. Whisk 5 eggs with 2 tbsp water. Add pinch of salt and pepper.
  7. Heat 1 tbsp EVOO in 10 inch sauté pan over med heat
  8. Add onions, garlic, red pepper, oregano, cumin, paprika, chili powder, 1 pinch of salt and 1 pinch of pepper to the pan. Cook until veggies are soft and cooked down – about 5 min.
  9. Add eggs to pan. Turn heat to med/low
  10. Let eggs sit for about 30 seconds. Then start to scrape pan and make scrambled eggs. Continue to scrape cooked eggs off bottom of pan and mix in with uncooked eggs. Continue this for about 2 -3 min. When eggs are firming up but still look wet, meaning they have lots of moisture. Remove from heat.
  11. Add shredded cheese and bacon.
  12. Mix well until cheese is melted
  13. In center of each circle of dough, place about 1/2 cup of egg mixture
  14. Fold the dough over the mixture to make a closed half circle, with the mixture inside
  15. Pat down the edges and then use a fork to seal the edges
  16. Place empanada on greased baking sheet
  17. Repeat until all empanadas are complete
  18. Bake according to dough directions, usually about 13 minutes or so
  19. Check to see if dough is golden brown and firm, but do not overcook!
  20. Remove from oven. Let cool and serve.
  21. I often serve w/ salsa and sour cream, sometimes chopped avocado.

IMG_4453

dough disks on counter

IMG_4455

flattened with rolling pin

IMG_4456

ready for filling!

IMG_4460

onion, red pepper, garlic, spices cooking in EVOO

IMG_4462

adding eggs to veggie mix

IMG_4463

scrambling eggs – removing from heat

IMG_4464

adding bacon and cheese

IMG_4465

adding filing to empanada dough

IMG_4466

rolling dough over to make half circle

IMG_4467

empanadas done cooking!

IMG_4468

finished empanada 

IMG_4469

cut in half

IMG_4470

mmmm – yum! breakfast empanada

Sausage Vegetable Bake (EASY!)

Standard

IMG_4434

I am not even joking about how easy this recipe is, and how yummy it is…and its good FOR YOU. Well, its not fried, or cooked in oil, or a pan on the stove…its all roasted and 1/2 of the meal is veggies. 🙂 The only hassle at all with this recipe is chopping vegetables, but if you hate that part – buy them pre-chopped at your grocery store and you’ll fly through this. I only took like 3 pictures because this is such a fast/easy recipe. My son even ate it and he never eats veggies OR meat! #WINNING mom move. I hope you like it as much as my family did.

Ingredients:

  • 1 package rope sausage (or you can use a package of links). I used Johnsonville – love that brand. Slice the sausage, about 1/4 inch thick.
  • 1.5 cups small new potatoes or other small potato variety – cut into halves or quarters (want them to be the size of a quarter or smaller)
  • 1.5 cups asparagus chopped into 2 inch pieces
  • 2 cups broccoli chopped small
  • 1 cup canned corn – drain liquid
  • 1 cup chopped red pepper
  • 1 tbsp oregano
  • 1 tbsp sage
  • 1 tbsp thyme
  • 2 tsp garlic powder
  • 3 tbsp EVOO
  • salt
  • pepper

Directions:

  1. Heat oven to 400 degrees
  2. In large mixing bowl, add sausage, broccoli, red pepper, asparagus, oregano, thyme, sage, garlic powder 1 tsp pepper, 2 pinches salt and 2 tbsp EVOO. Mix well and place onto foil-lined baking sheet
  3. In same bowl, add 1 tbsp EVOO, potatoes, pinch of salt and pinch of black pepper. Mix well to coat and place on separate foil-lined baking sheet.
  4. Place both baking sheets into the oven. Turn timer on for 10 minutes.
  5. At 10 min flip over the veggie/sausage mix – turning all vegetables & sausage over
  6. At the same 10 min mark, flip the potatoes as well…and then sprinkle the cup of corn onto the potatoes
  7. Turn on timer for 3 more minutes. Then remove veggies/sausage. (total cooking time about 13 min)
  8. Check potatoes for tenderness, if not easy to pierce with fork – return to oven for 3 more minutes at a time until done.
  9. Mix both trays into large serving bowl – potatoes/corn and sausage/veggie mix
  10. Serve!

IMG_4419

the little potatoes I use

IMG_4433

potatoes tossed in oil, salt, pepper ready for oven

IMG_4432

veggie and sausage mixed with herbs & olive oil – ready for oven

IMG_4434

final product!